 Save to Pinterest
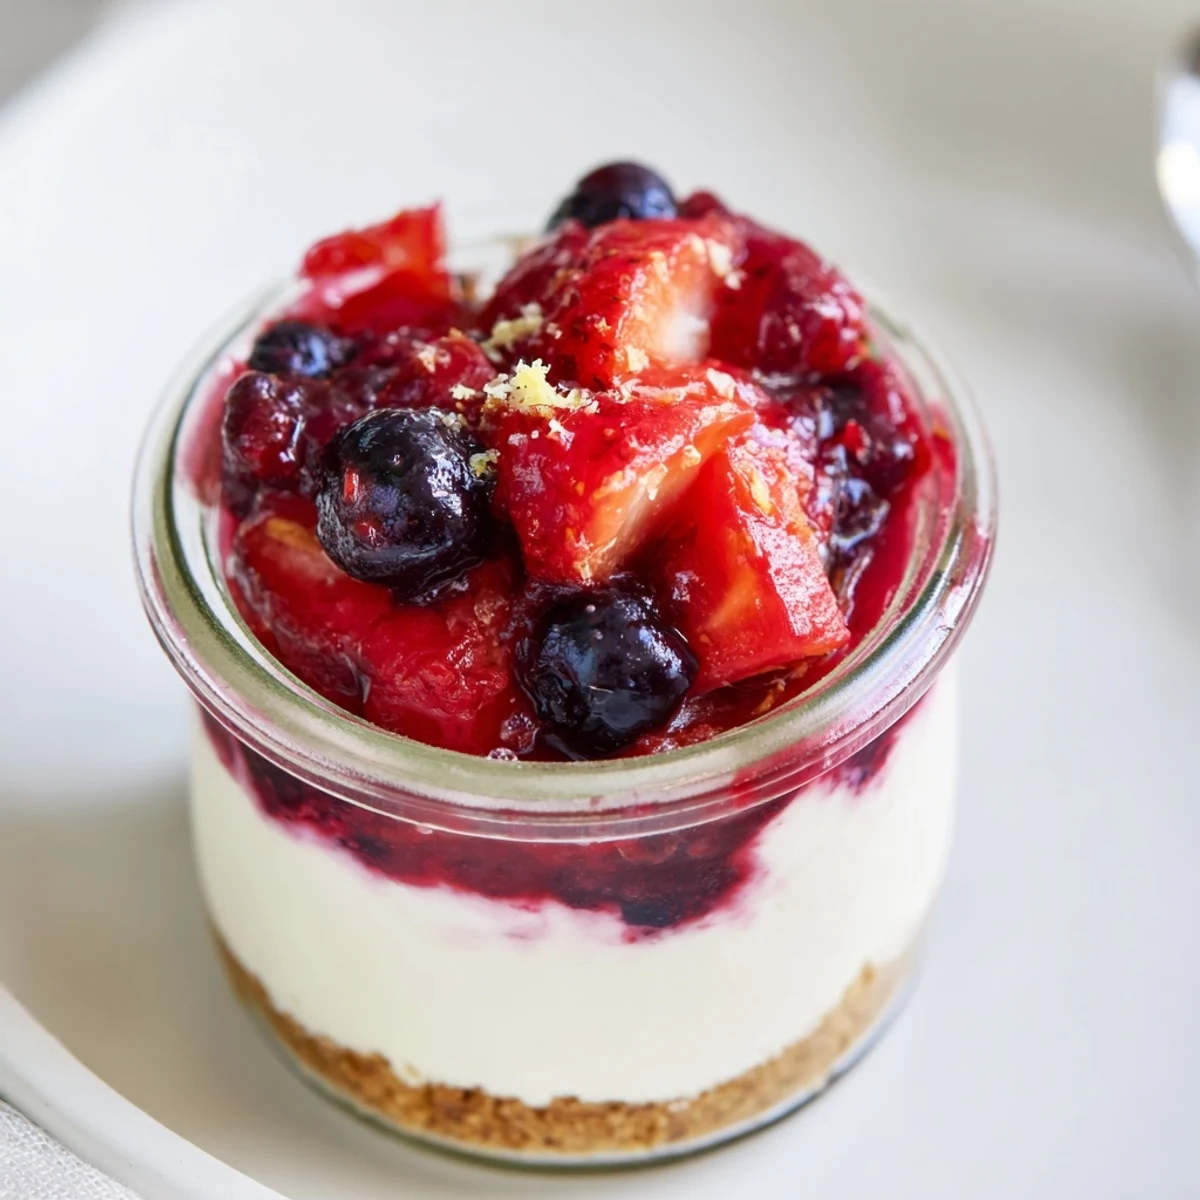
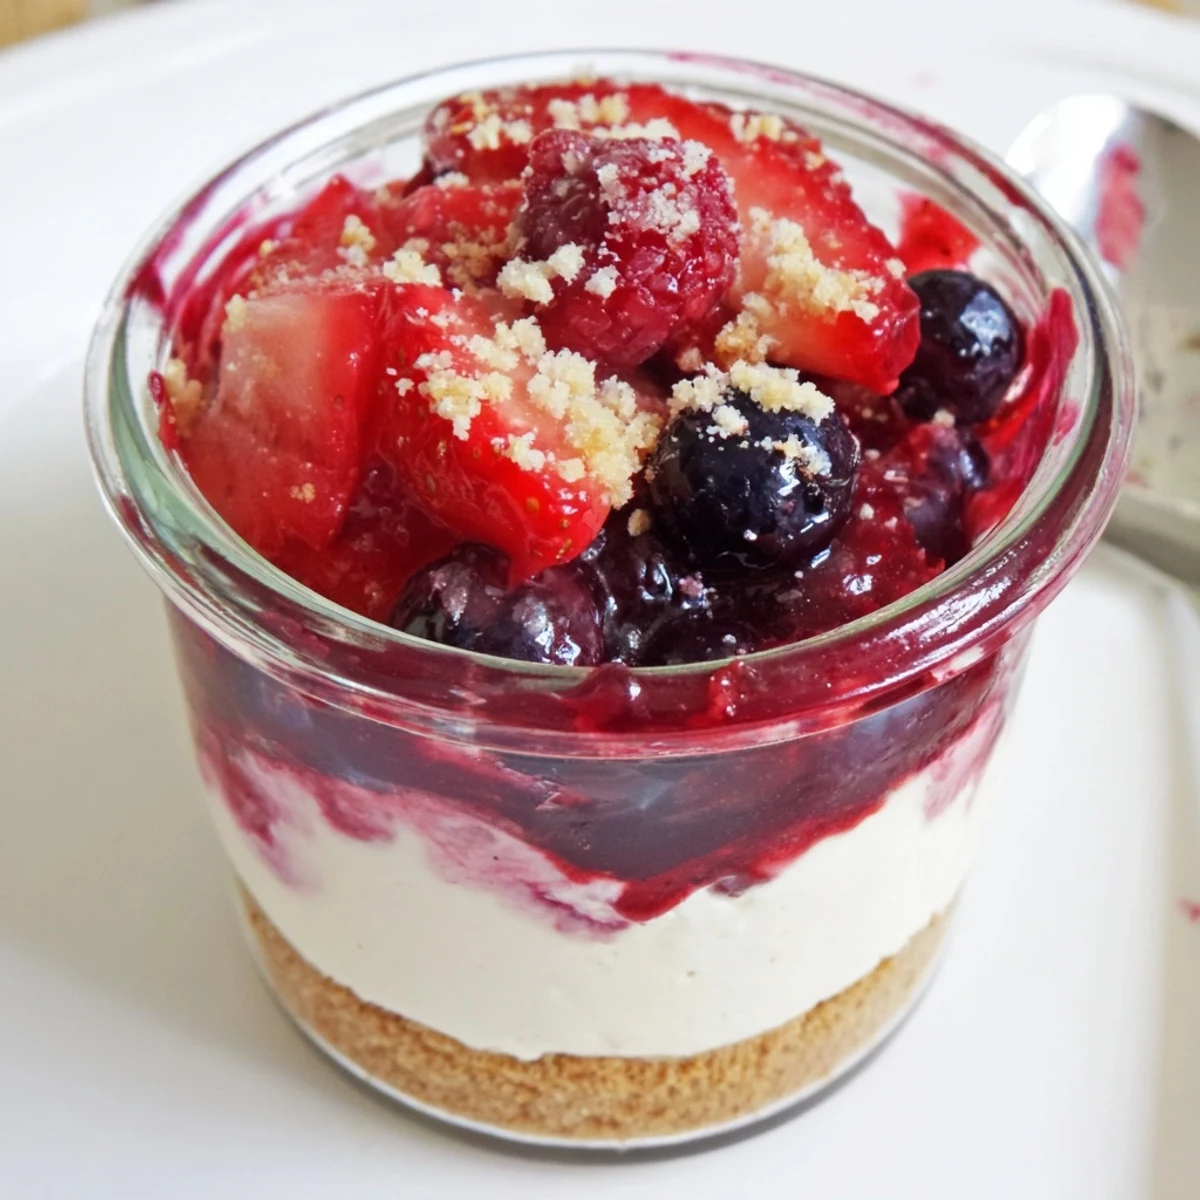
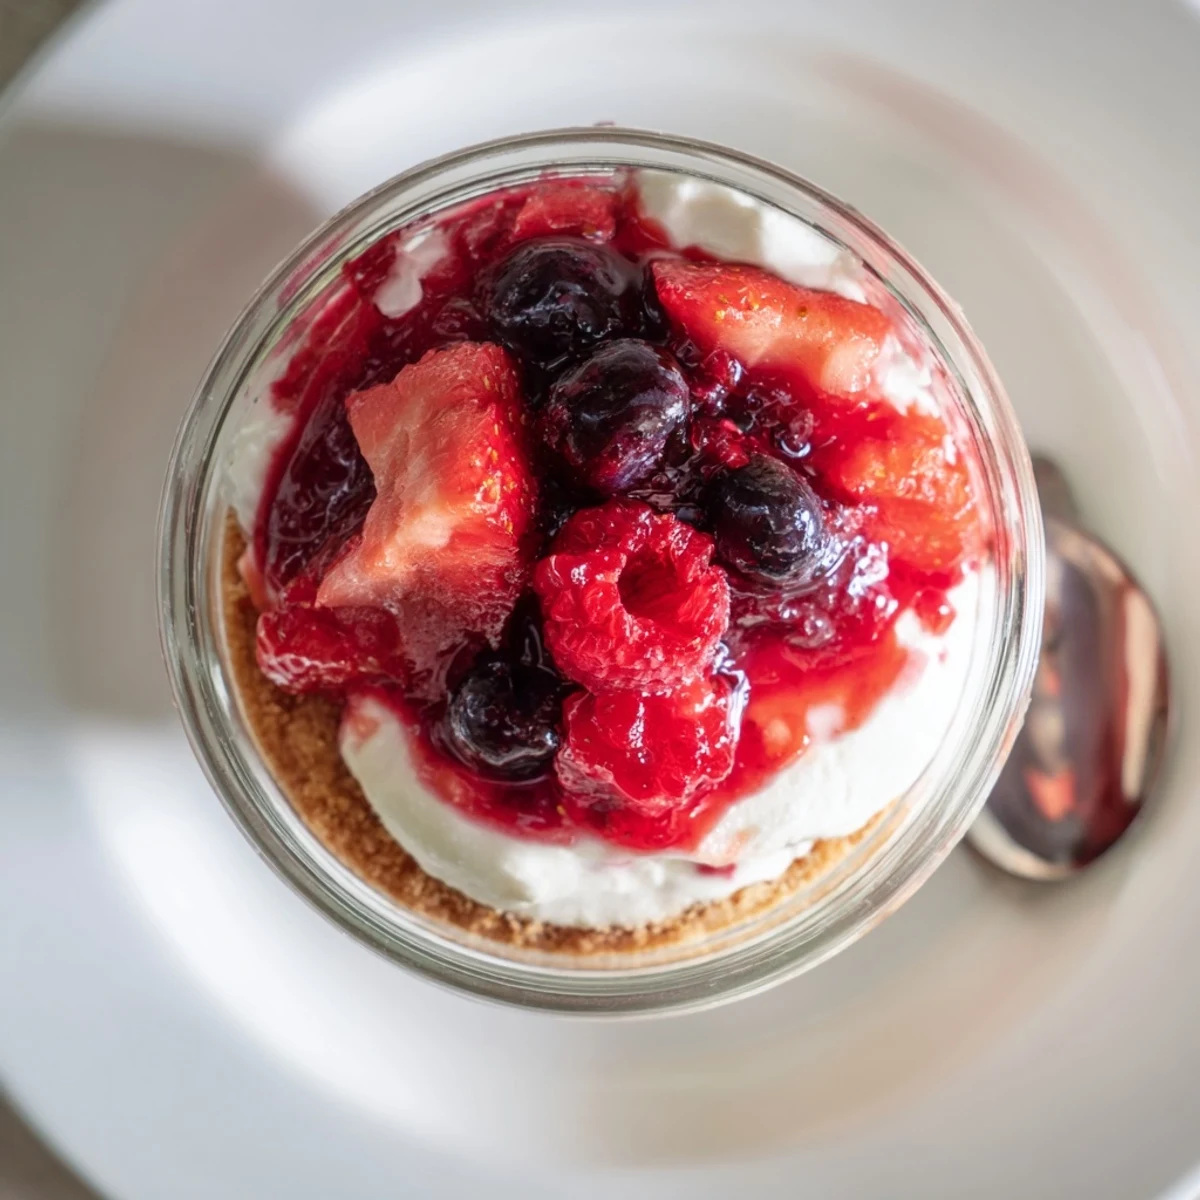
 Quick no-bake cheesecakes layered in glasses: a crunchy biscuit base, a whipped cream cheese filling, and a macerated mixed berry topping. Make the base, whip cold cream to stiff peaks and fold into sweetened cream cheese, assemble in servings, top with sugared berries, then chill at least 3 hours. Serve cold; use gluten-free biscuits or a splash of berry liqueur if desired.
One early summer afternoon, I found myself making these berry no bake cheesecakes on a whim, simply because the kitchen was too hot to consider using the oven. The light through the window caught the ruby-red berries on my counter, practically daring me to turn them into something special. As the sound of the mixer hummed in the background, I was surprised by how soothing the process felt—almost meditative, with no rush or fuss. Each step became a small pleasure, amplified by the anticipation of tasting that first creamy, chilled spoonful.
The last time I made these cheesecakes, I had friends over for an impromptu dinner—everyone ended up in the kitchen, trading stories while we layered cream and berries into the little glasses. Someone joked that dessert looked too pretty to eat, but five minutes later, the only thing left was a few berry-stained spoons. There was laughter over uneven layers and someone sneaking a taste of the whipped cream. It felt more like an event than just assembling dessert.
Ingredients
- Graham crackers or digestive biscuits: Crushing them by hand keeps the texture rustic, and the buttery crunch is everything against soft cream cheese.
- Unsalted butter: Melting it makes the base rich and helps hold the crumb layer together; I let it cool slightly so it doesn’t melt the biscuits.
- Cream cheese: Letting it soften helps it whip up cloud-light without lumps—a lesson I learned the hard way.
- Heavy cream: Cold cream whips faster and firmer; sometimes I even chill the bowl too.
- Powdered sugar: It dissolves instantly, making the filling sleek and sweet but not gritty.
- Vanilla extract: Just a dash brings a mellow, bakery-warm depth to the whole cheesecake.
- Lemon zest: Optional for brightness, but I love how it lifts every bite if you have a fresh lemon around.
- Mixed fresh berries: Choose what looks ripest—juicy strawberries, tart raspberries, and sweet blueberries are my usual picks.
- Sugar: Barely enough to coax the fruit’s juice out—don’t skip the rest time, that syrupy sauce is worth it.
- Lemon juice: A splash wakes up dull berries and softens them into a compote-like topping.
Instructions
- Prepare the biscuit base:
- Dump the crushed biscuits into a bowl, pour over the melted butter, and mix until every crumb looks shiny and golden. Spoon into your serving glasses and gently press down with the back of a spoon to make a firm base—don’t worry if it’s a little rustic.
- Make the cheesecake filling:
- Start by beating the cream cheese until smooth and fluffy—I love watching it go from dense to airy. Add the powdered sugar, vanilla, and zest, whisking until all the little sugar clouds disappear.
- Whip the heavy cream:
- Whip the cold cream in a separate bowl until stiff peaks form; I always pause to check by lifting the beaters and seeing those peaks stand tall. Gently fold the whipped cream into the cream cheese mixture so you keep everything light—no need for perfection here.
- Assemble the cheesecakes:
- Spoon or pipe the cream filling over the biscuit base—sometimes I use a piping bag for fun, but a spoon works just as well. Smooth the tops so they’re ready for that fruity crown.
- Make the berry topping:
- Toss your berries with sugar and lemon juice in a small bowl, then let them sit about 10 minutes until they glisten and release syrup. The smell always reminds me of berry picking—tart and sweet at the same time.
- Layer and chill:
- Spoon the macerated berries over the cheesecake layer, making sure to get plenty of juicy sauce in each portion. Chill the cheesecakes for at least 3 hours or overnight to set—the wait is the hardest part.
 Save to Pinterest
 The first time I served these at a summer picnic, someone asked for the recipe before they even finished their portion. It was one of those moments where the food felt like the star, yet effortless and unfussy.
Sweet Swaps and Variations
Sometimes, when I only have one kind of berry or a few leftover cherries, I swap in stone fruit or even diced mango for a tropical twist. You can also add a touch of berry liqueur or elderflower cordial to the compote for a grown-up version. The best part: there’s no wrong way to layer flavors or color.
Serving Suggestions
I love to serve these cheesecakes right in the glass, so you get the pretty layers at first glance. A sprinkle of lemon zest or a few edible flowers adds a little flourish, especially if you’re bringing desserts to a party. Don’t forget an extra spoon—someone will always ask for seconds.
Making Ahead and Storage
The cheesecakes actually get better if you leave them overnight—everything melds and becomes even creamier. They keep well, covered in the fridge, for up to two days; just add the berry topping right before serving so it stays vibrant.
- If your berries seem extra juicy, drain a little liquid to prevent soggy layers.
- I’ve even frozen assembled cheesecakes for a short stint and enjoyed them semi-frozen as a summer treat.
- Leaving one or two bites for breakfast the next day is strongly encouraged.
 Save to Pinterest
 However you layer them, these cheesecakes never last long in my kitchen. Here’s to simple sweets, shared with good company!
Recipe Help & Support
- → Can I use different biscuits for the base?
-
Yes. Graham crackers or digestive biscuits give a classic texture, but you can swap for gluten-free cookies, shortbread, or crushed amaretti for a nuttier note. Adjust butter to reach a pressable crumb.
- → How do I know when whipped cream has stiff peaks?
-
Lift the whisk: stiff peaks hold their shape and stand upright without collapsing. Use chilled cream and a cold bowl for best results; overwhipping can make the cream grainy, so stop when peaks are firm but glossy.
- → Can the cheesecakes be made ahead?
-
Yes. Assemble and chill for at least 3 hours, or refrigerate overnight. They keep well for up to 48 hours; add fresh berries or extra compote just before serving for best texture.
- → How do I prevent a watery berry topping?
-
Mac erate berries briefly with sugar and lemon juice—10–15 minutes lets juices develop. Drain excess liquid if needed or simmer the berries briefly to thicken before cooling for a slightly jammy compote.
- → Can I make a richer filling?
-
Yes. Fold in a bit more cream or use mascarpone with cream cheese for a silkier, richer texture. A teaspoon of lemon zest brightens the filling without thinning it.
- → What are good serving suggestions?
-
Serve chilled in glasses or ramekins with a scattering of fresh berries and a mint leaf. These pair nicely with sparkling wine or a light, sweet white for contrast.
