 Save to Pinterest
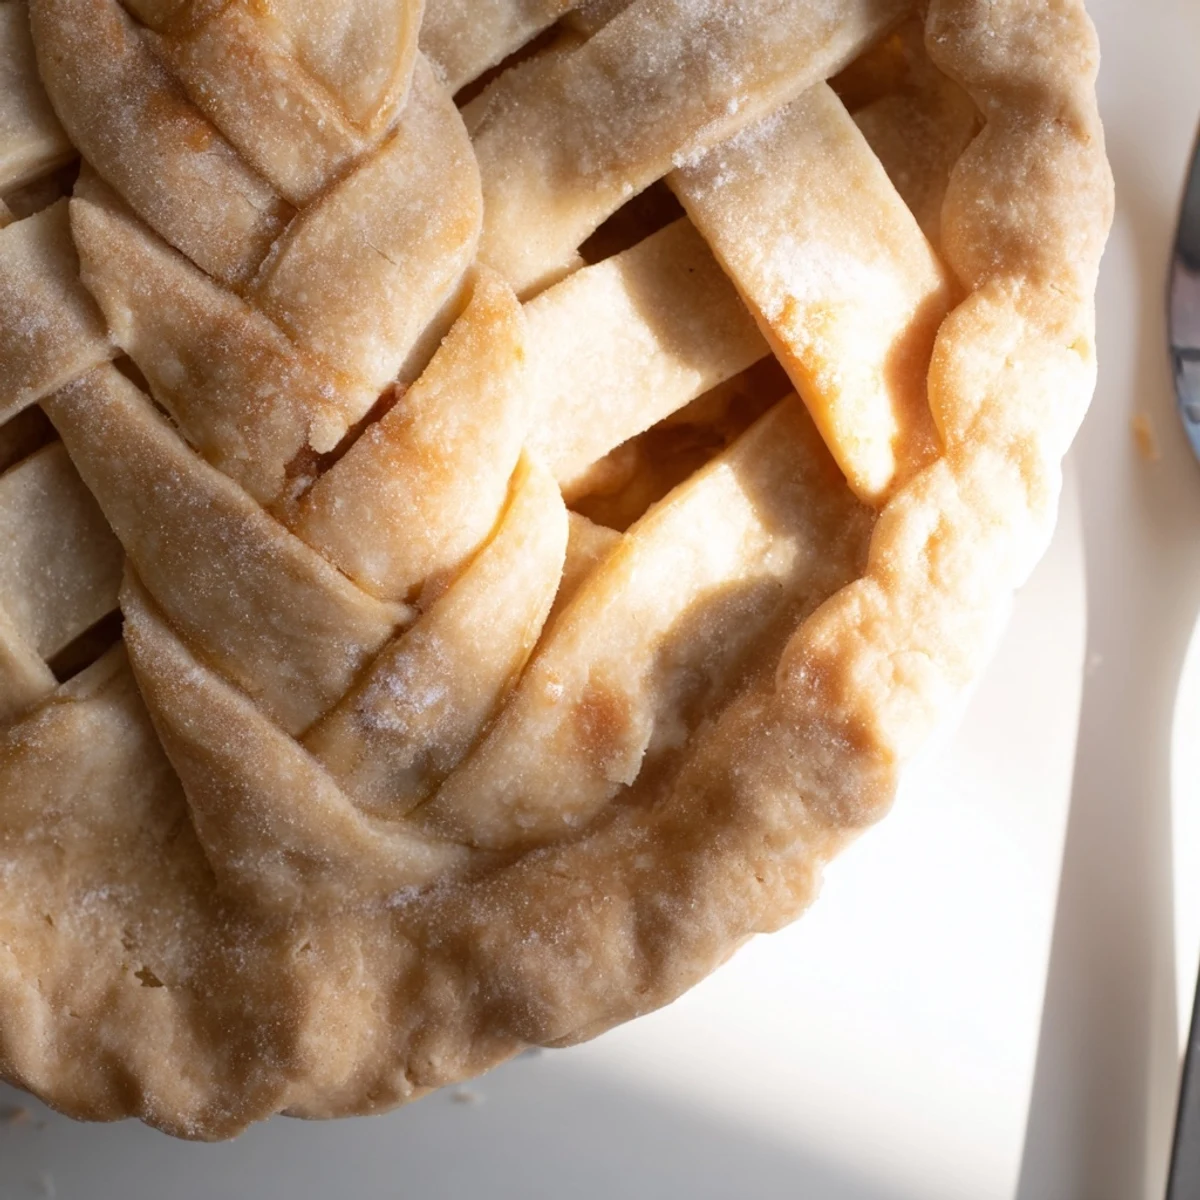
 Transform ordinary pies into stunning centerpieces with this fishtail braid crust technique. The method involves rolling dough into thin strips, weaving them into an intricate braid pattern, and attaching around the pie edge for a bakery-quality finish. Perfect for holiday gatherings, special occasions, or whenever you want to elevate your baking presentation.
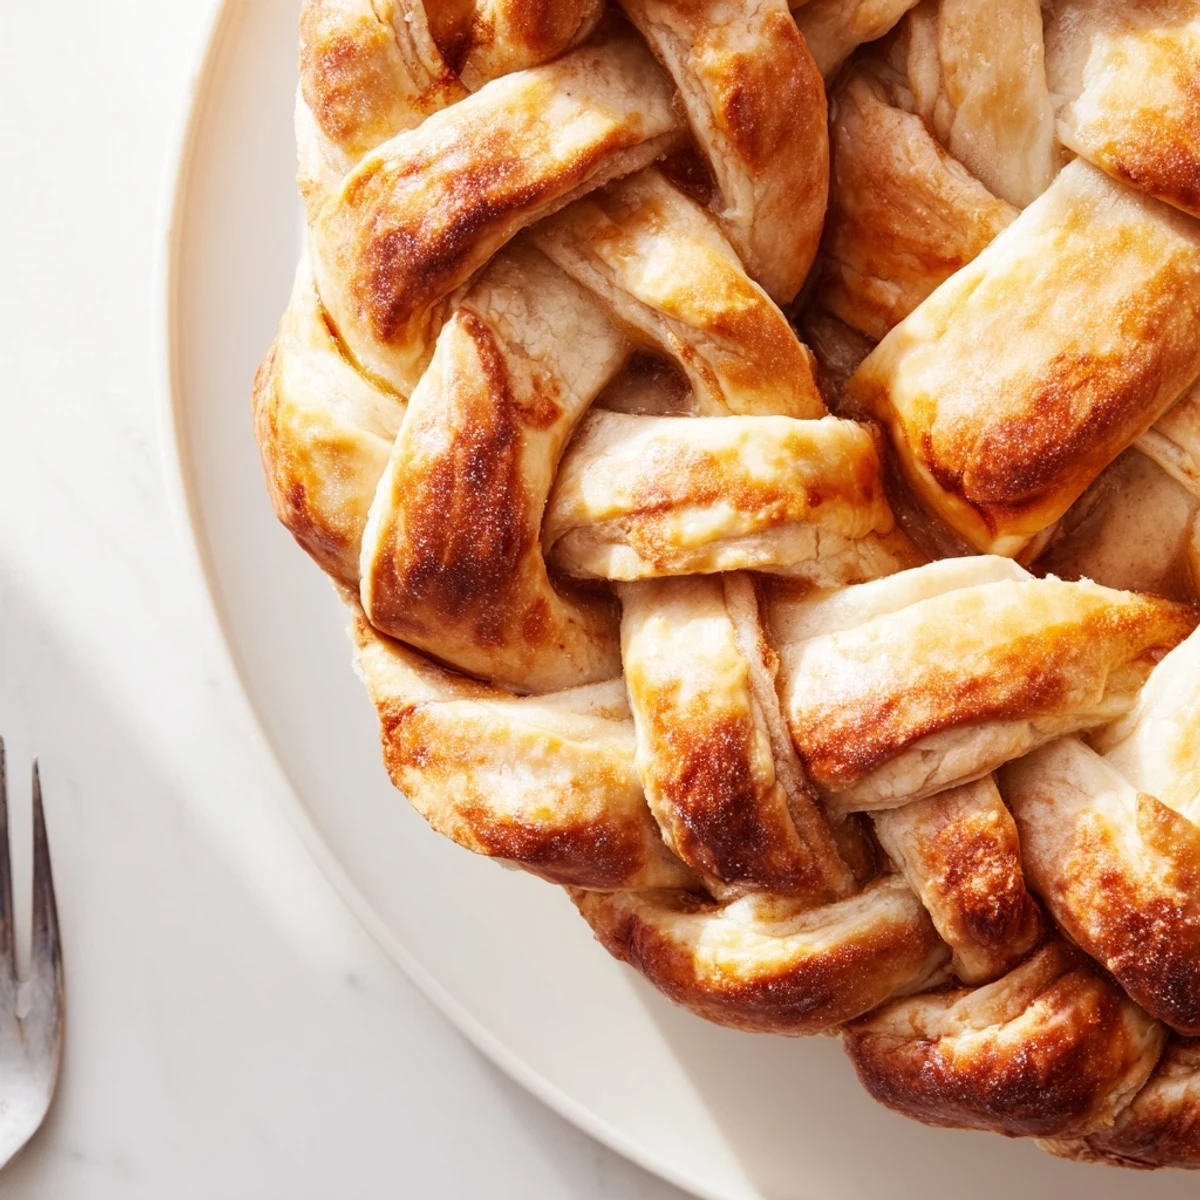
The first time I attempted a fishtail braid on a pie crust, my kitchen looked like a flour bomb had gone off. I was making a peach pie for my sister's birthday, convinced I could teach myself this technique from a blurry photo I'd seen online. The braid came out lopsided and floppy, but somehow after baking, it transformed into this golden, intricate crown that made everyone at the table gasp. I've been refining the method ever since, and now it's my go-to trick for turning ordinary pies into conversation starters.
Last Thanksgiving, I made three different pies with this braided crust, and my aunt actually took photos before cutting into them. What I didn't tell her was that I'd assembled them while sipping wine and chatting, because once the dough is chilled and cut into strips, the braiding becomes this relaxing, repetitive motion. The best part is watching people try to figure out how you did it, their forks hovering suspiciously over the edge before taking that first perfect bite.
Ingredients
- 2 1/2 cups all-purpose flour: I've learned that weighing flour (315g) gives more consistent results than scoop-and-measure, especially for pastry where precision matters.
- 1 cup unsalted butter, cold and cubed: Keep your butter freezing cold and work quickly—warm butter is the enemy of flaky crust, a lesson I learned through many sad, tough pie bottoms.
- 1 tsp salt: Don't skip this even for sweet pies, it balances the richness and makes those buttery notes sing.
- 1 tbsp sugar: Optional, but I always add it for dessert pies because it helps the crust brown beautifully and adds just a hint of sweetness.
- 1/4 to 1/2 cup ice water: Start with less and add only what you need—the dough should hold together when squeezed but still look somewhat shaggy and dry.
- 1 egg beaten with 1 tbsp milk or water: This wash is what gives your braid that gorgeous, professional sheen that makes people think you bought the pie from a bakery.
Instructions
- Mix your foundation:
- Whisk flour, salt, and sugar in a large bowl, then work in cold butter using a pastry cutter or your fingers until you see coarse crumbs with visible pea-sized butter pieces throughout.
- Add life with ice water:
- Drizzle in 1/4 cup ice water, mixing gently with your hands just until dough holds together when squeezed, adding more water only if needed—overworking will make your crust tough, not tender.
- Let it rest:
- Divide dough in half, form into flat disks, wrap tightly, and chill for at least one hour—this rest relaxes the gluten and firms the butter, both essential for easy rolling later.
- Roll for braiding:
- On a floured surface, roll one chilled disk into a rectangle about 1/8 inch thick, then use a ruler and knife or pizza cutter to cut at least six even strips about 12 inches long and 1/2 inch wide.
- Create your fishtail:
- Press three strips together at one end, cross the right strip over center, then left over new center, and continue by always pulling from the outermost edge to center—unlike regular braiding, you're working from the outside in.
- Secure the crown:
- Trim excess dough from your filled pie, brush the rim with water to help the braid adhere, then gently lift and shape your braid around the edge, pressing lightly to seal.
- Gild the lily:
- Brush the entire braid with your egg wash, taking care not to let it pool, which can prevent even browning.
- Bake to golden:
- If pre-baking the shell, chill for 15 minutes then bake at 375°F for 12-15 minutes until deeply golden—for filled pies, bake according to your recipe, adding a few extra minutes if needed to fully brown the braid.
 Save to Pinterest
 My daughter now asks to help with the braiding every time we make pie, and her version has this charmingly rustic quality that somehow tastes even better than my carefully measured attempts. There's something lovely about passing down a technique that feels like a little piece of edible art, especially when it becomes a family tradition that spans generations.
Getting The Right Dough Consistency
Through many failed attempts, I've learned that the dough should feel like cold cookie dough when you're rolling it out—pliable but never sticky or soft. If it starts to fight back or spring back when you roll, give it a quick chill in the freezer for 5 to 10 minutes. This is especially important during summer months when kitchens run warm.
Making Multiple Braids
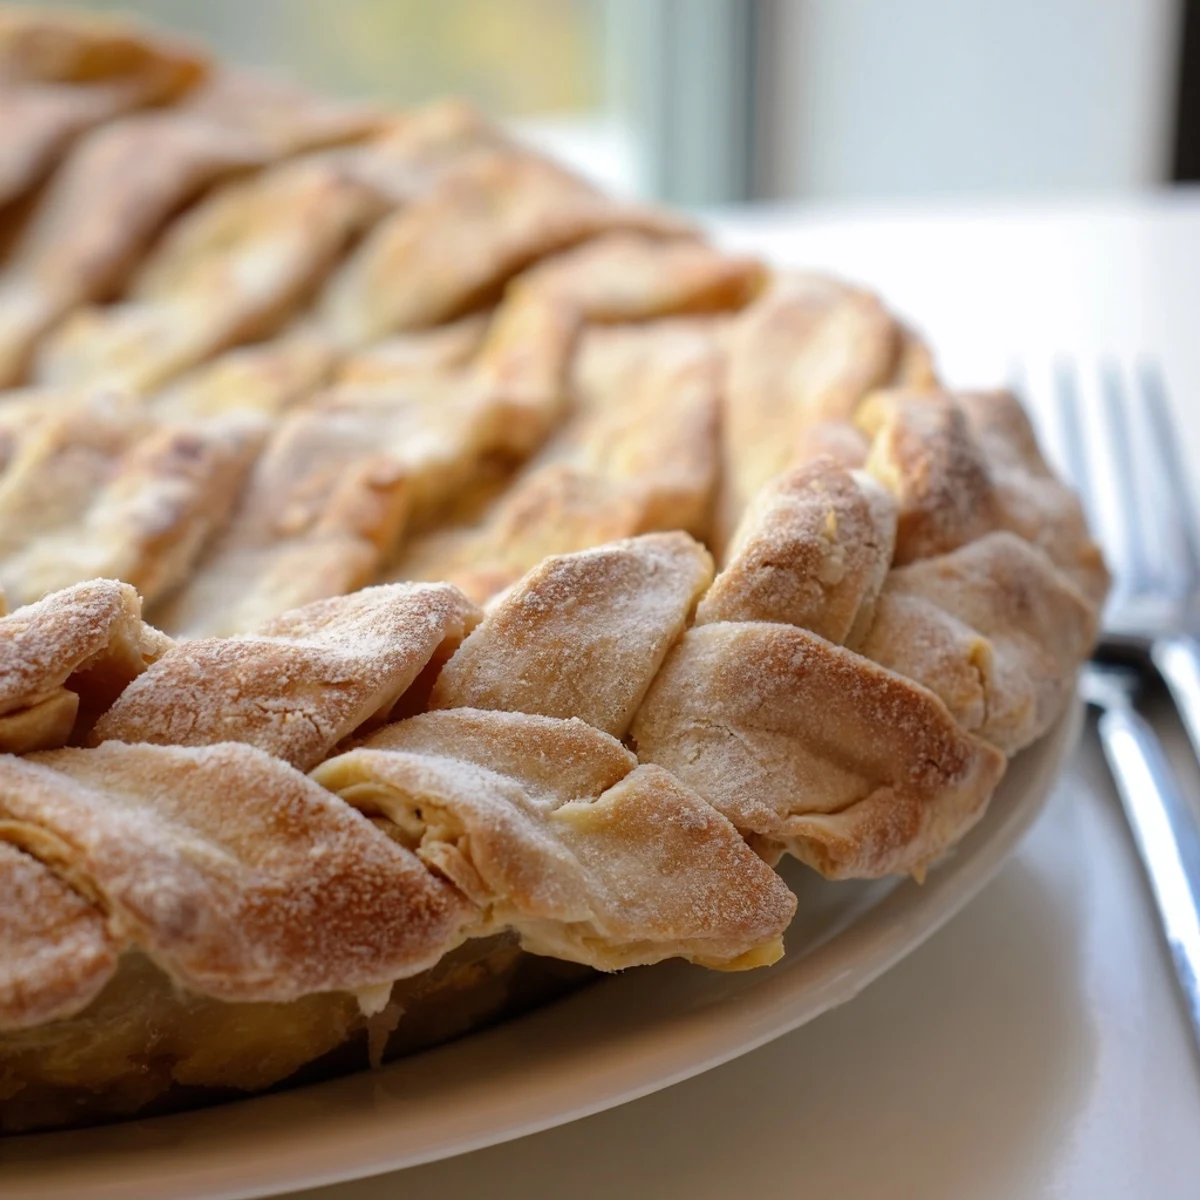
For a standard 9-inch pie, you'll need two to three fishtail braids to fully cover the edge, and I recommend cutting all your strips first before braiding any of them. Work assembly-line style: cut all strips, braid them all, then apply them to the pie. This keeps your hands from warming up the dough as much, and you can always put strips back in the fridge if they get too soft while you're working.
Troubleshooting And Variations
Sometimes despite your best efforts, a braid will break or lose its shape—don't panic, just press it back together and keep going, since baking hides all manner of sins. I've discovered that adding herbs like rosemary or thyme to the dough creates incredible savory pie borders for quiches and pot pies. For special occasions, try weaving in thin strips of beet-dyed or spinach-dyed dough for a stunning two-tone effect that photographs beautifully.
- Freeze leftover dough strips for up to three months and use them to top individual pot pies.
- If your braid looks uneven after baking, no one will notice once you slice into that gorgeous pie.
- The egg wash can be replaced with cream or even maple syrup for different finishes and flavors.
 Save to Pinterest
 There's something deeply satisfying about serving a pie with that intricate braided edge, watching faces light up before anyone even takes a bite. This technique transformed my pie baking from purely functional to genuinely artistic, and I think it might do the same for you.
Recipe Help & Support
- → Can I make the braided crust ahead of time?
-
Yes, prepare the braids and freeze them on a baking sheet. Once frozen solid, transfer to an airtight container and store for up to 2 months. Apply frozen braids directly to your pie before baking.
- → What's the secret to keeping braids from separating during baking?
-
Keep everything cold. Chill the dough thoroughly before cutting strips. After braiding, refrigerate for 15 minutes before attaching to the pie. Brushing the pie edge with water helps the braid adhere securely.
- → Can I use store-bought pie dough for this technique?
-
Absolutely. Thaw frozen dough according to package directions, then proceed with rolling and cutting strips. Homemade dough tends to hold intricate shapes better, but refrigerated dough works well with proper chilling.
- → How many braids do I need for one 9-inch pie?
-
Typically 2-3 fishtail braids measuring about 12 inches each will cover a standard 9-inch pie circumference. The exact number depends on braid thickness and how tightly you weave them.
- → What fillings work best with this decorative crust?
-
This versatile decoration complements fruit pies like apple or cherry, custard pies like pumpkin, and savory options like quiches or chicken pot pies. Avoid very runny fillings that might boil over and obscure the braid.
- → How do I prevent the braid from burning?
-
If the braid browns too quickly, tent the pie edges with aluminum foil after the first 20 minutes of baking. Alternatively, use a pie shield or create a foil ring specifically for protecting the crust.
