 Save to Pinterest
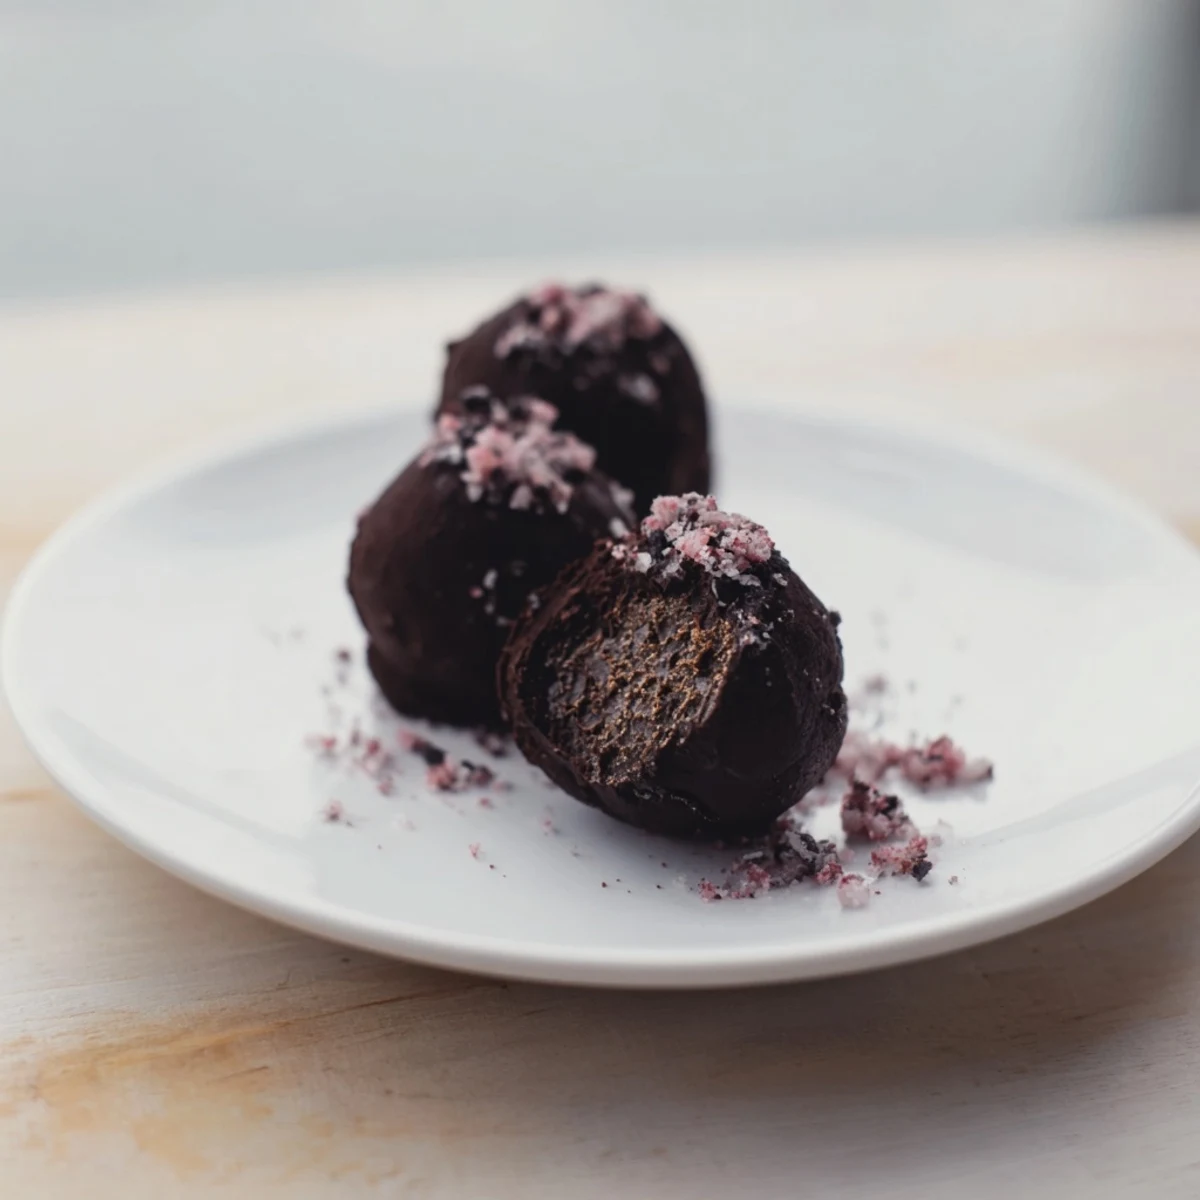
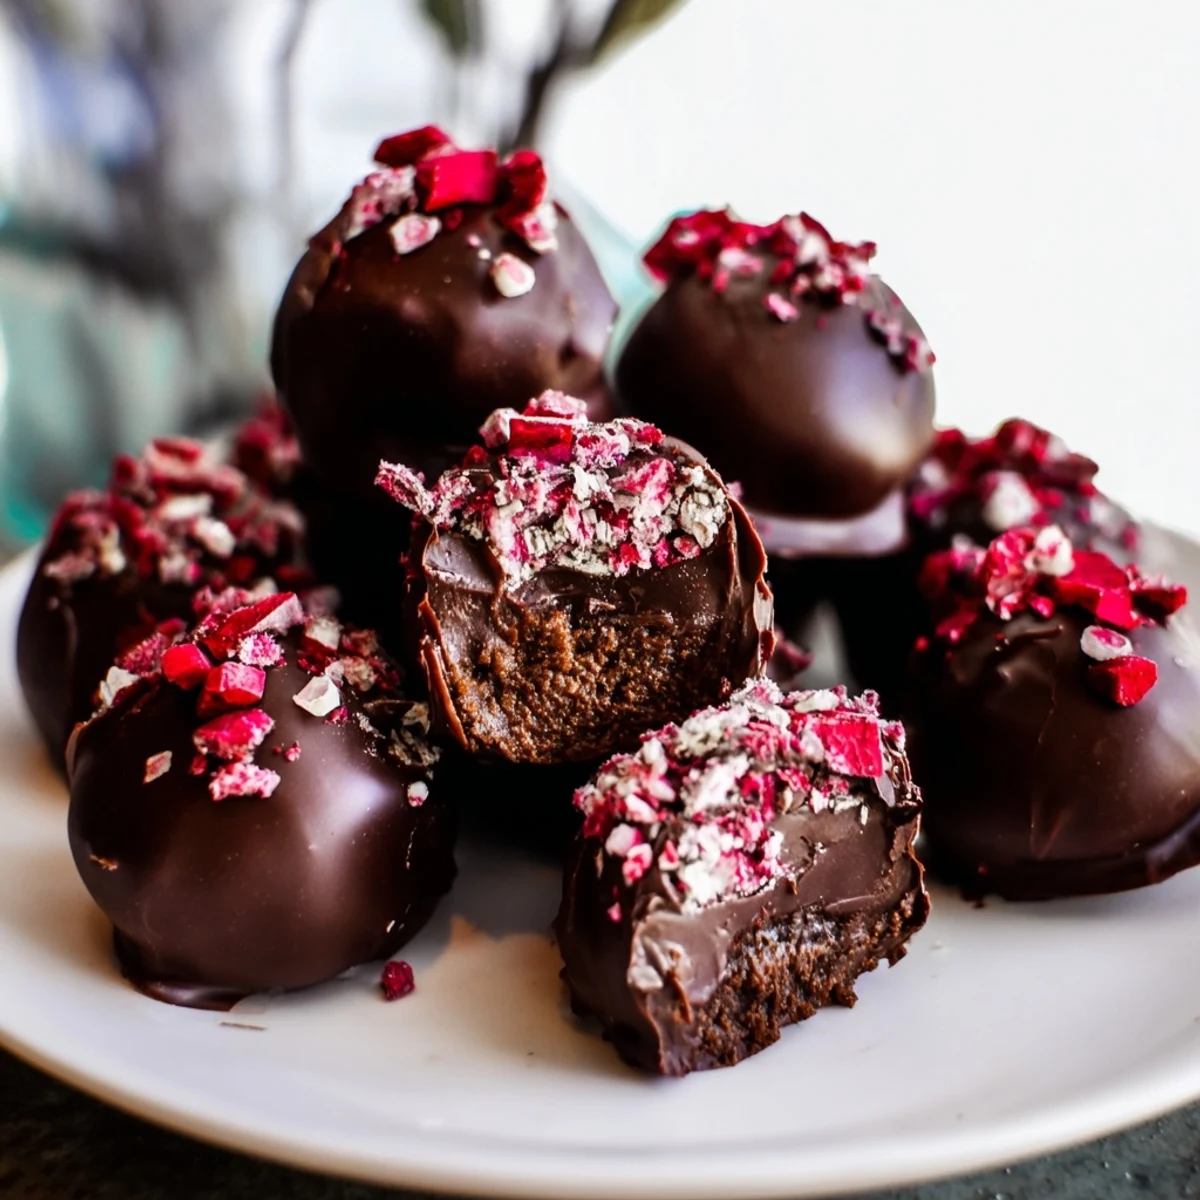
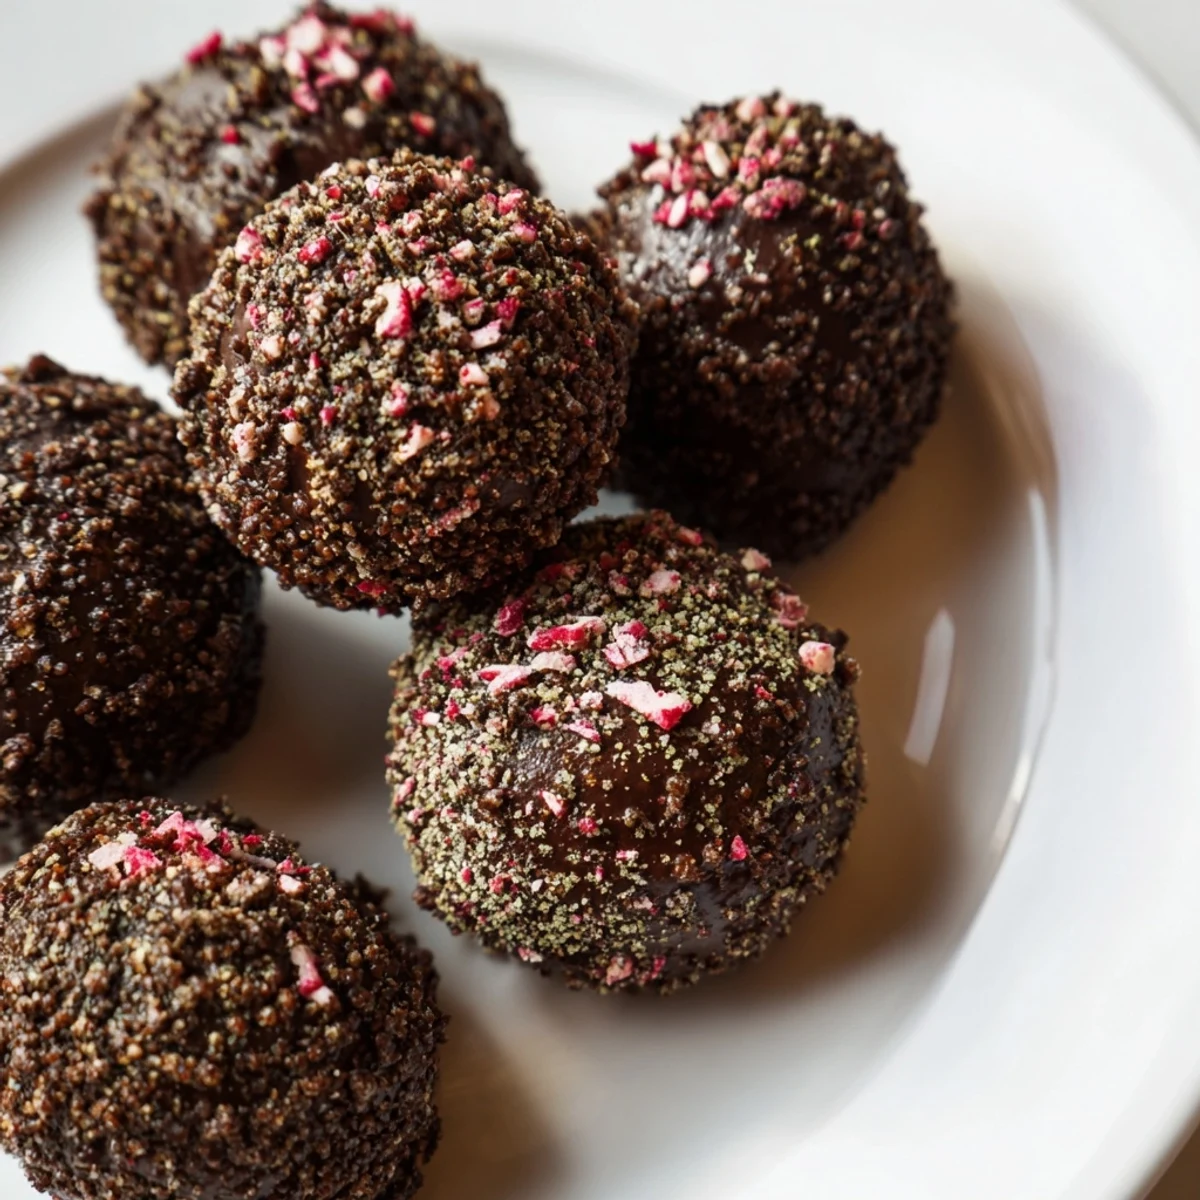
 Experience a blend of creamy chocolate ganache infused with espresso and peppermint extract, chilled until firm. These truffles are coated in melted dark or milk chocolate and garnished with crushed peppermint candies, creating a festive and indulgent confection. Preparation involves combining quality chocolate with cream, butter, espresso, and peppermint, then chilling before shaping and coating. Perfect for gifting or enjoying as a special treat, these truffles balance rich chocolate flavors with refreshing peppermint notes.
I discovered peppermint mochas on a snowy December afternoon at a cozy café downtown, and I became completely obsessed. The way the rich espresso played against cool mint felt like a small luxury I could give myself on gray winter days. One evening, curled up with my favorite book, I thought: why not capture that exact magic in truffle form? After some kitchen experimentation and a few beautiful failures, I created these little gems that taste exactly like that café moment, but made with my own hands in my own kitchen.
I remember making these for my book club on a chilly November evening, and watching my friends' faces light up when they bit into one was absolutely priceless. Someone asked if they were store-bought, and I got to smile and say I made them myself. That moment taught me that homemade chocolate is always worth the small effort, because it carries something special that expensive truffles from fancy shops simply cannot.
Ingredients
- Semi-sweet chocolate (225g): This is your truffle's soul. Finely chop it so it melts smoothly and evenly when the hot cream hits it. I learned the hard way that chunky pieces create grainy truffles, so invest 30 seconds in a proper chop.
- Heavy cream (60ml): This creates the silky ganache center. The ratio of cream to chocolate is sacred here; too little and your truffles crumble, too much and they're pudding-like.
- Unsalted butter (2 tbsp): Room temperature is non-negotiable. Cold butter won't incorporate smoothly and warm butter separates. Take it out of the fridge while you prep everything else.
- Instant espresso powder (1 tbsp): This amplifies the chocolate's depth without making the truffles taste like coffee. It's the secret ingredient that makes people ask what makes these different.
- Peppermint extract (1/2 tsp): Peppermint extract is potent, so start conservative. You can always taste and add more, but you cannot undo peppermint overload.
- Vanilla extract (1/4 tsp): This rounds out the flavors and adds warmth. It's subtle but noticeable in its absence.
- Dark or milk chocolate for coating (200g): Choose based on your preference. Dark chocolate creates a more sophisticated finish, while milk chocolate leans into the dessert sweetness.
- Crushed peppermint candies (3 tbsp): This garnish isn't just decoration; it adds that crucial peppermint pop and visual beauty. Crush them right before you need them so they stay vibrant and don't get dusty.
Instructions
- Gather and Prepare Your Canvas:
- Set up your workspace like you mean it. Have your heatproof bowl ready, your chocolate finely chopped in one pile, your espresso powder measured out, and a pinch of salt ready. This is where the magic begins, and having everything organized means you won't scramble when the hot cream is waiting.
- Combine the Dry Ingredients:
- Pour your chopped semi-sweet chocolate into the heatproof bowl with the espresso powder and salt. Give it a gentle stir to distribute the espresso evenly. This pre-mixing ensures every truffle gets the same rich coffee note.
- Heat the Cream and Butter:
- In a small saucepan, combine the heavy cream and butter. Watch as the butter softens and starts to melt into the cream. You're listening for that quiet simmer, not a rolling boil. When tiny bubbles form around the edges, you're there.
- Create the Emulsion:
- Here's the moment that feels almost magical. Pour that hot cream mixture slowly over the chocolate. Resist the urge to stir immediately. Let it sit for exactly 2 minutes. This is when the heat gently melts the chocolate from the outside in. When you finally stir, you'll feel it transform into glossy, velvety ganache.
- Add the Flavor Layers:
- Stir in the peppermint extract and vanilla extract. Watch how the ganache suddenly smells like a winter holiday, like comfort, like memory. Taste a tiny bit on your finger if you're bold enough.
- Chill with Intention:
- Cover your ganache bowl and refrigerate for 1 to 2 hours. This is patience being rewarded. When you check on it later, you'll find it transformed into something firm enough to hold its shape when scooped.
- Shape Your Little Treasures:
- Line a baking sheet with parchment paper. Scoop heaping teaspoons of the chilled ganache and roll each one between your palms into a ball. Your hands will warm the ganache slightly, which actually helps it hold its shape. Arrange them on the sheet and freeze for 15 minutes.
- Prepare the Chocolate Coat:
- Pour your chopped coating chocolate into a microwave-safe bowl. Add coconut oil if you want an especially silky finish. Microwave in 30-second bursts, stirring between each one. Patience here prevents seizing and burnt chocolate. Stop while there are still tiny unmelted pieces; they'll continue melting from residual heat.
- The Dip:
- Using a fork, pick up one truffle and lower it into the melted chocolate, rolling gently to coat all sides. Let the excess drip back into the bowl, then carefully place it back on your sheet. This fork-dipping method feels elegant and actually works beautifully.
- Garnish While Courage is Hot:
- Immediately after dipping, before the chocolate sets even a little, sprinkle crushed peppermint candy over each truffle. This is timing, this is intention, this is the difference between pretty truffles and stunning ones.
- The Final Set:
- Allow your truffles to set at room temperature for about an hour, or refrigerate them to speed the process. Either way, you now have 24 little chocolate jewels that taste like a café memory.
 Save to Pinterest
 These truffles became my answer to almost every winter occasion. I made them for neighbors who were going through a rough time, for friends during stressful weeks, for my partner just because it was Tuesday and I wanted him to know I was thinking of him. There's something about giving homemade chocolate that bridges any season or circumstance with warmth and intention.
The Magic of the Espresso and Peppermint Partnership
What makes these truffles special isn't just that they taste good, it's how the espresso and peppermint dance together on your tongue. The espresso deepens and rounds the chocolate, giving it a sophisticated edge, while the peppermint arrives like a cool, fresh breeze. Neither one overpowers the other when you get the ratios right. I've learned that this balance is what separates a good chocolate from a memorable one. The espresso doesn't scream coffee, and the peppermint doesn't taste like toothpaste. Instead, they create this harmonious complexity that makes people pause mid-bite and ask what makes these different from regular truffles.
Gifting and Storage Wisdom
These truffles have become my favorite gift because they feel luxurious but are actually quite practical. They store beautifully in an airtight container in the refrigerator for up to a week, which means you can make them ahead without stress. I like to arrange them in a pretty box with parchment paper between the layers, and suddenly you have something that looks like it came from a high-end chocolatier. The presentation is half the gift, honestly. People appreciate the care it takes to make something by hand, and these truffles prove that handmade doesn't have to mean complicated.
Variations and Personal Touches
Once you master the basic recipe, you realize how flexible and forgiving it is. I've made batches with dark chocolate for a more intense flavor, milk chocolate for friends who prefer something sweeter, and even white chocolate for a completely different experience. The peppermint-espresso core stays the same, but the outer coating changes everything. I've also experimented with different garnishes—crushed candy canes for extra festive flair, a sprinkle of cocoa powder for sophistication, or even a drizzle of white chocolate for visual contrast. The beauty is that you can make them your own.
- For a dairy-free version, swap heavy cream for coconut cream and use vegan chocolate. The truffles turn out slightly less rich but still absolutely delicious.
- If you want stronger peppermint flavor without the extract, try crushing fresh peppermint leaves and steeping them in the warm cream before pouring it over the chocolate.
- Store in the coldest part of your refrigerator if your kitchen runs warm, and pull them out 5 minutes before serving so they're soft enough to melt on the tongue.
 Save to Pinterest
 Making these truffles reminds me why I love cooking and baking so much. It's not really about the chocolate or the peppermint or the espresso; it's about creating something beautiful with your hands and sharing it with people you care about. I hope these truffles become your winter tradition too.
Recipe Help & Support
- → What type of chocolate works best for the ganache?
-
Semi-sweet chocolate finely chopped offers a balanced sweetness and smooth texture ideal for ganache.
- → Can I make these truffles dairy-free?
-
Yes, substituting heavy cream with coconut cream and using vegan chocolate creates a dairy-free version with similar texture.
- → How should the truffles be stored?
-
Keep them in an airtight container in the refrigerator to maintain freshness for up to one week.
- → Is it possible to adjust the peppermint flavor intensity?
-
Yes, add peppermint extract gradually but do not exceed one teaspoon to avoid overpowering the chocolate base.
- → What tools are recommended for making these truffles?
-
A heatproof mixing bowl, small saucepan, spatula or whisk, baking sheet lined with parchment paper, and a fork for coating are ideal.
