 Save to Pinterest
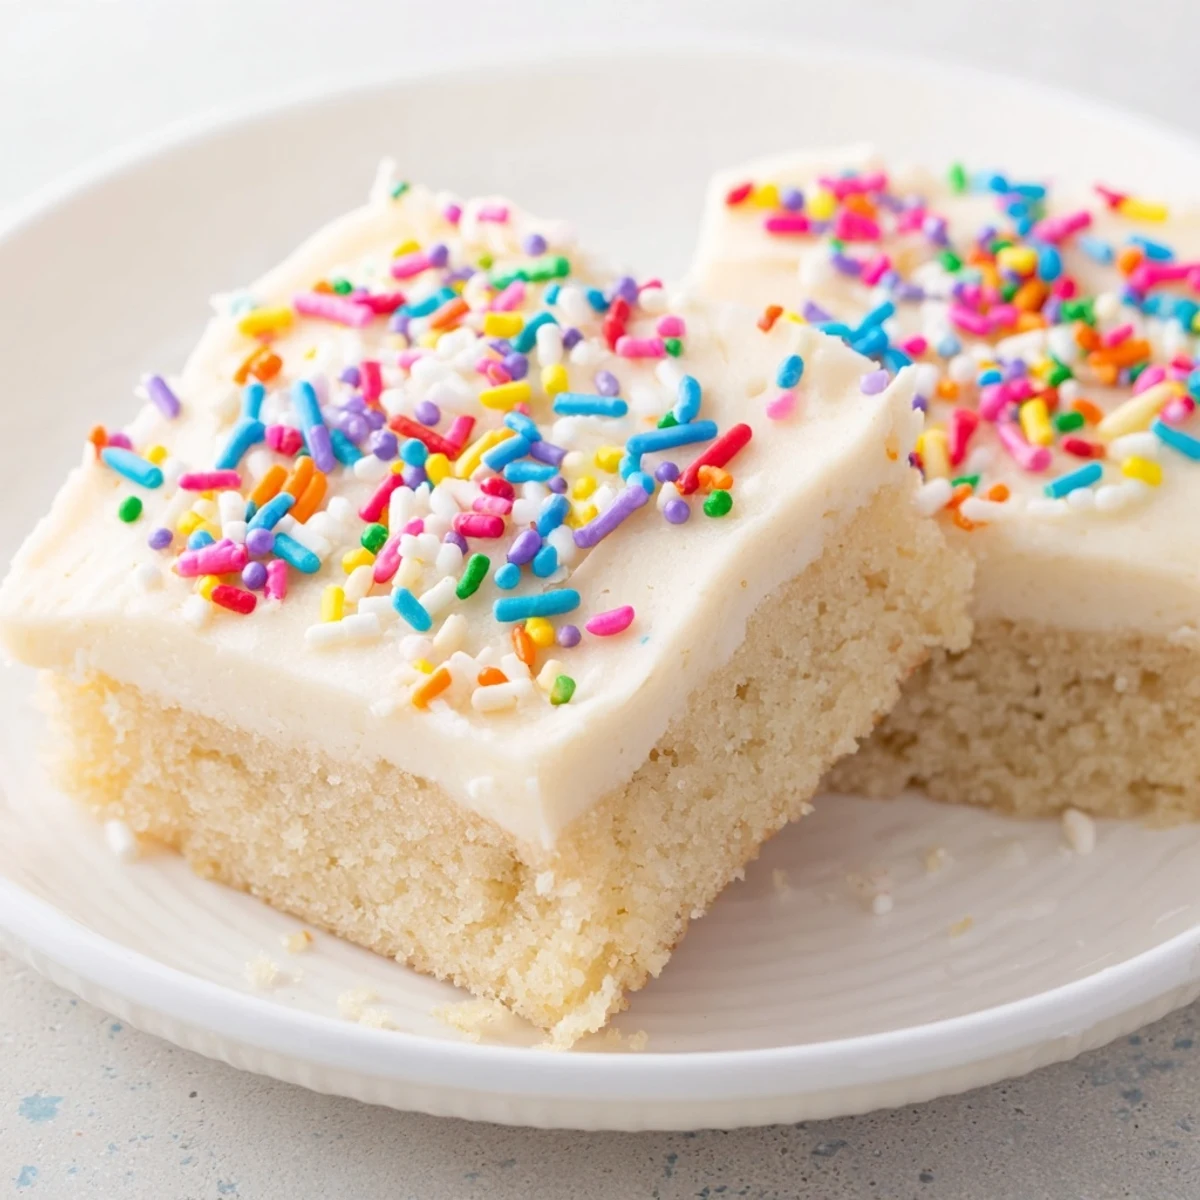
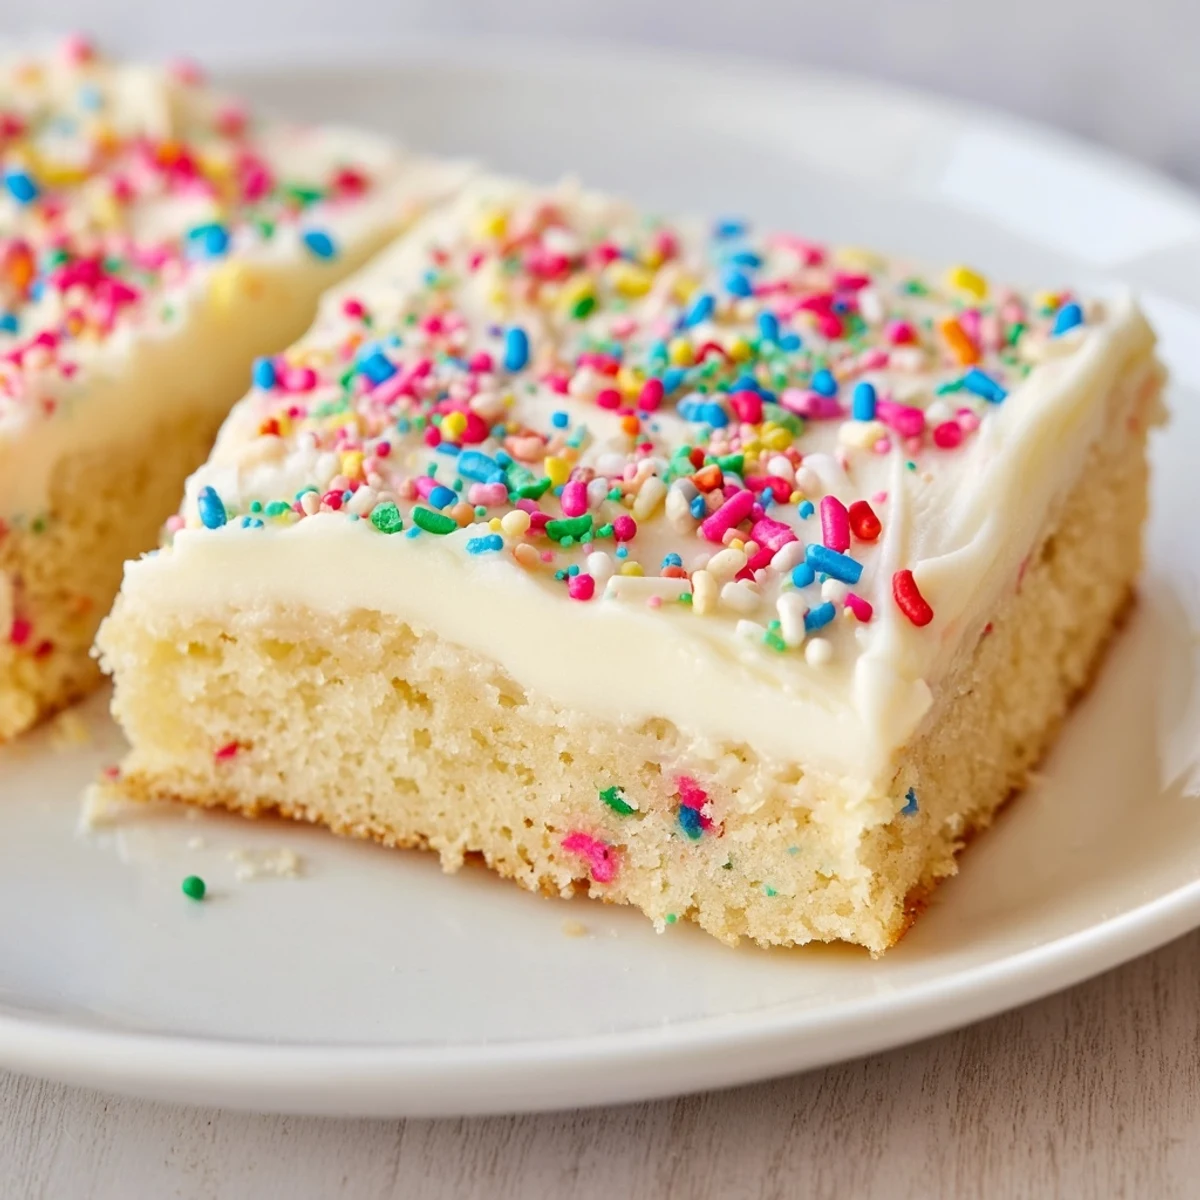
 These soft, buttery sugar cookie bars combine the classic taste of traditional sugar cookies with the convenience of a bar format. The dough comes together quickly with simple pantry staples, bakes into a tender base, and gets topped with silky vanilla frosting that you can customize with colors and sprinkles for any occasion.
My youngest sister called me at 9pm on a Tuesday, panic in her voice because she had promised to bring treats for her office potluck the next morning but had zero time to roll out individual cookies. That conversation birthed this recipe, which has since saved me more times than I care to admit.
I brought these to a friends birthday party last summer, and honestly thought they might be too simple compared to the elaborate desserts other guests brought. But within twenty minutes, the platter was empty, and three different people asked for the recipe right then and there.
Ingredients
- Unsalted butter: I keep my butter on the counter for exactly one hour before baking room temperature butter incorporates into sugar more easily creating that tender crumb we all want
- Granulated sugar: The original recipe called for more sugar but I reduced it slightly because the frosting adds plenty of sweetness and I prefer when the cookie flavor shines through
- Pure vanilla extract: Never skip on vanilla here because it carries the entire flavor profile I use double what most recipes call for
- All purpose flour: Spoon and level your flour instead of scooping directly from the bag to avoid dense bars
- Baking powder and salt: This tiny amount of leavening gives the bars just enough lift without making them cakey
- Powdered sugar: Sifting is non negotiable here because one lump can ruin an otherwise perfectly smooth frosting
- Whole milk: You might need slightly more or less depending on humidity so add it one tablespoon at a time
Instructions
- Preheat and prepare:
- Set your oven to 350°F and line a 9x13 inch pan with parchment paper letting the paper hang over the long sides like a sling I learned this trick after too many batches stuck to the bottom
- Cream the butter and sugar:
- Beat them together for a full 3 minutes until the mixture looks pale and fluffy this step creates air pockets that make the bars tender
- Add the egg and vanilla:
- Crack the egg into the mixture and pour in the vanilla then beat until you cannot see any streaks of egg remaining about 30 seconds
- Whisk the dry ingredients:
- In a separate bowl combine the flour baking powder and salt I do this even though it feels extra because it prevents overmixing later
- Combine the mixtures:
- Add the dry ingredients to the butter mixture and mix on low just until the flour disappears overmixing makes tough bars so stop as soon as it comes together
- Press into the pan:
- The dough will be thick so use clean hands to press it evenly into the pan I press slightly harder at the corners to ensure uniform thickness
- Bake until set:
- Bake for 18 to 22 minutes checking at the 18 minute mark because ovens vary you want the edges barely golden and the center no longer glossy
- Cool completely:
- This is the hardest part but you must let them cool fully in the pan or the frosting will melt right off which I learned the hard way once
- Make the frosting:
- Beat the butter until creamy then gradually add the powdered sugar followed by milk vanilla and salt until it is smooth and spreadable
- Frost and slice:
- Spread the frosting over the cooled bars add sprinkles if you want then use the parchment sling to lift them out before cutting into 24 squares
 Save to Pinterest
 My daughter now requests these for every school function and has started helping me press the dough into the pan her small hands are actually better at getting it perfectly even than mine.
Making Them Your Own
I have experimented with countless variations but my family still argues about which one is best. Sometimes I add almond extract instead of vanilla for a more sophisticated flavor that adults seem to prefer.
Storage Secrets
These bars actually taste better on day two after the flavors have had time to meld together. I store them in the pan with a tight layer of foil or transfer them to an airtight container if I need the pan back.
Party Perfect Presentation
For holiday parties I divide the frosting and tint each portion a different color creating swirled patterns on top that look impressive but take only minutes. The visual impact always makes people think I spent hours on them.
- Cut them with a sharp knife wiped clean between each slice for perfectly neat edges
- Chill the frosted bars for 15 minutes before slicing to prevent the frosting from pulling
- Layer them between wax paper in a container if you need to stack them for transport
 Save to Pinterest
 These bars have become my go to for every occasion because they never fail me and disappear faster than anything else I bake.
Recipe Help & Support
- → Can I make these bars ahead of time?
-
Yes, bake and frost the bars up to 2 days in advance. Store in an airtight container at room temperature. The frosting helps keep the bars moist and fresh.
- → What's the best way to cut clean squares?
-
Let the bars cool completely and chill the frosted pan for 30 minutes before slicing. Use a sharp knife wiped clean between cuts for the neatest edges.
- → Can I freeze these sugar cookie bars?
-
Absolutely! Wrap unfrosted bars tightly in plastic and freeze for up to 3 months. Thaw at room temperature, then add frosting before serving.
- → How do I know when the bars are done baking?
-
The edges should be lightly golden and the center set but still soft. A toothpick inserted in the center should come out with just a few moist crumbs, not wet batter.
- → Can I use salted butter instead of unsalted?
-
Yes, reduce the added salt in both the dough and frosting by half. The bars will still turn out delicious with a slightly different flavor balance.
- → What frosting variations work well?
-
Try almond extract instead of vanilla, add cocoa powder for chocolate frosting, or mix in cream cheese for a tangier finish. Gel food coloring creates vibrant shades without thinning the frosting.
